Moving Collaboration Footer from SharePoint Starter Kit
This is the bonus post in the mini-series about moving the portal footer from the SharePoint Starter Kit into a separate project.
This time we’re going to move to a separate project the Collaboration Footer:

You can get the source code for the final solution in the collab-footer repository.
I’ll give a shortened version of how to move the footer to a separate package. Refer to the main posts in the series for details.
Collaboration footer overview
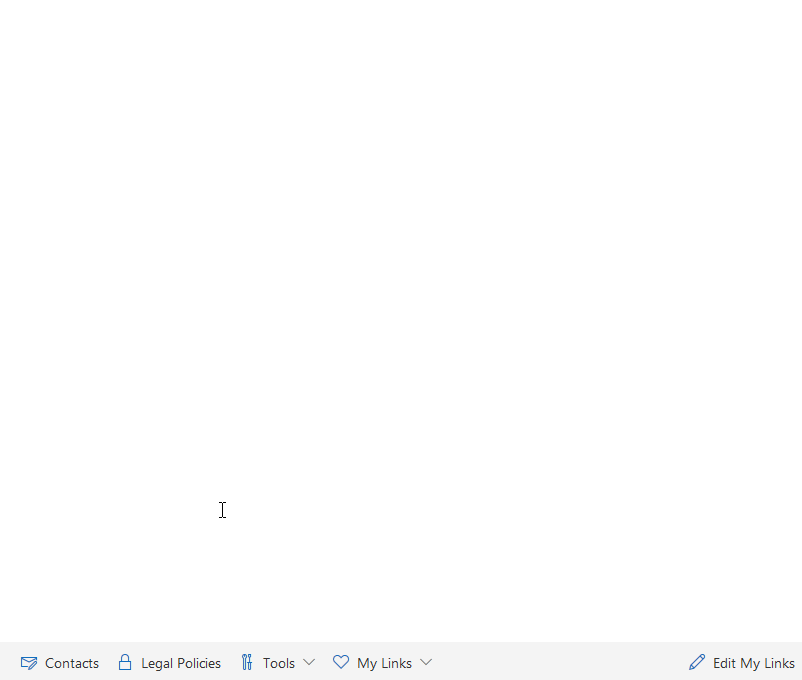
The collaboration footer is similar to the portal footer but looks a little bit different. It provides company-wide links that are stored in a term set and personal links that are stored in a user profile property.
Create data sources
Let’s start by creating a term set for company-wide links and a user profile property for personal links.
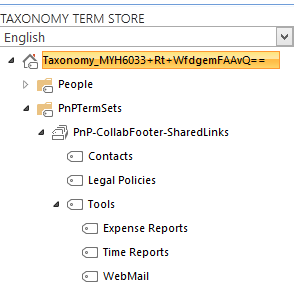
You can provision a demo term group with the collab-footer-term-group.xml and PnP cmdlet:
Import-PnPTermGroupFromXml -Path ./collab-footer-term-group.xmlThis will create the PnPTermSets group with the PnP-CollabFooter-SharedLinks term set that contains demo links.
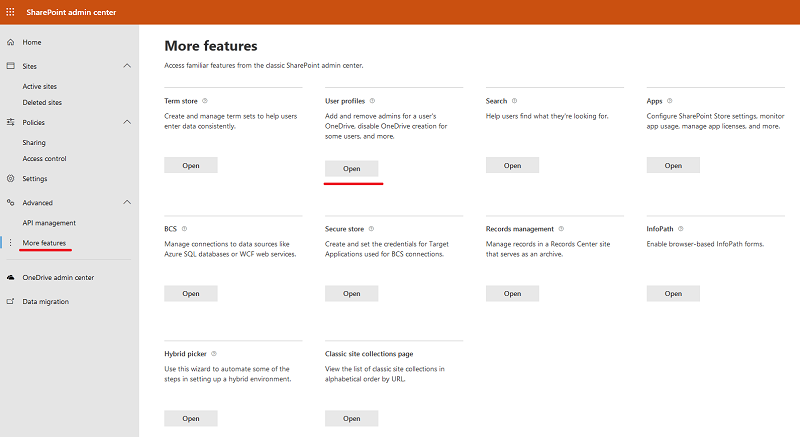
For personal links, we need to create a property in user profiles. The process is described in the Create a Custom Property in the User Profile Service section in the Starter Kit guide.
The only thing to consider is that an access point for the user profiles page has been changed in the SharePoint admin center. You can now find it in the SharePoint admin center in More features → User profiles:
Create new project
Now, we’re ready to create a new SharePoint Framework project. I’ll skip the details here, refer to the Moving Footer from SharePoint Starter Kit. Part 3: New Project post for a detailed process description.
Once the project is created, we need to copy the collaboration footer files from the SharePoint Starter Kit. Copy collabFooter, common, and services folders to the src folder of the new project.
Note: Keep the original CollabFooterApplicationCustomizer.manifest.json file from the new project. This way the collaboration footer id would be different from the one in the SharePoint Starter Kit. It is important to avoid possible collisions.
Deploy and add to site
Now you can use gulp serve to start the debug version of the footer.
To deploy the final solution you can use pre-built collab-footer.sppkg package or build it with the source code:
gulp clean
gulp bundle --ship
gulp package-solution --ship
Deploy package to the App site
Now we need to deploy our app to the App catalog site collection. After that, we can install the app with the footer on sites.
Add footer to site
We can add the footer to a site by installing the footer app on this site. This can be done in UI by going to Site Content → New App → collab-footer-client-side-solution.
The same can be done in PowerShell (I’m using PnP PowerShell cmdlets here):
Connect-PnPOnline SITE_URL
Install-PnPApp -Identity APP_ID
Here SITE_URL is the url of the site you want to add the footer to; APP_ID is the unique id of the application. You can get the id by listing all the applications with the Get-PnPApp cmdlet.
After adding the app to the site, the footer will appear: